In this post I will describe one way of configuring your PC to allow it to connect to your equatorial mount and then use popular software to navigate the stars.
Before continuing make sure that you have a Windows PC, your mount connected to your PC and all applicable drivers installed. Please check out the links below to read more on these subjects.
Connect your PC
Install drivers for your PC
I’m planning on using the EQMod open source application and driver to control my mount since it has more features that the official application and driver. My mount, the Skywatcher HEQ5 Pro is equipped with the GoTo functionality and a SynScan hand controller. The hand controller is equipped with an USB port and you connect a USB cable between that port and your computer. On the hand controller, after the initial setup, you press utility and then scroll down to PC direct mode and press enter. The mount is now ready to communicate directly with the computer, bypassing the hand controller.
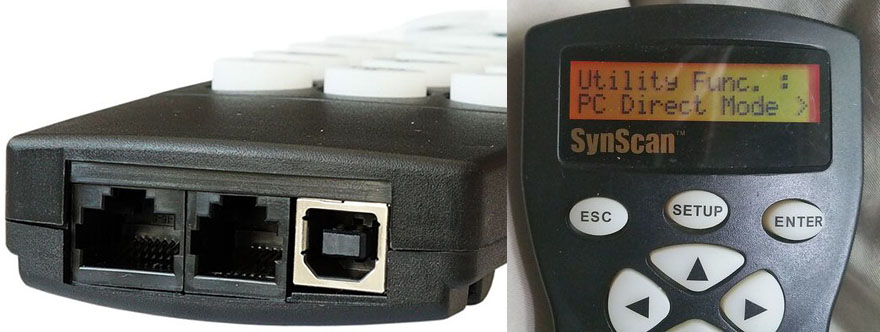
Please note that you need an USB-A to USB-B cable. If you have an older version of SynScan hand controller you don’t have a USB port and you would need to get the appropriate cable and adapter to USB.
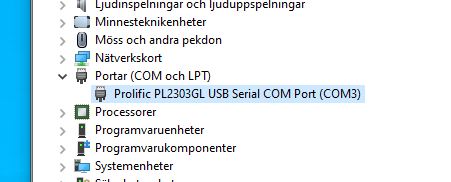
Before moving on you need to check the virtual COM port number assigned by Windows to this USB device. This is done by right clicking the Windows icon in the bottom left corner and clicking device manager. In the device manager, locate the USB device, usually under ports (COM & LPT) and check the COM port number. In my case it was COM3. Please note that this COM number can change if you make changes to your USB hub setup or connect the USB cable to abother USB port on your computer. Forgive me for having Swedish operating system.
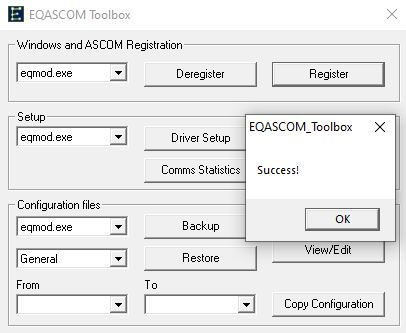
The next step is to open the EQASCOM Toolbox application that came with the EQMod installation. Make sure you run this application as administrator in Windows. Click on register and clear the success message (if you get an error message you did not run the application as administrator).
Continue by clicking driver setup. The EQMod ASCOM setup will open. Leave the mount options to auto detect. In the EQMod port details section you need to enter the COM port number that you checked earlier, for example COM3. Then you need to enter the following configuration:
Timeout: 1000, Retry: 2 and Baud: 9600.
If you have problems connecting to your mount, please check the port settings in your device manager and match the baud rate for the port with the setting in EQMod. If it still doesn’t work, set the baud rate to 115200 on the port and in EQMod.
In the site administration section enter logitude and latitude for your location as well as your current elevation. This information is available from a number of free apps on your phone. I use one called GPS Data for Android. Enter a name for your site and press the save icon.
In the guiding section you probably want to leave the default setting of ASCOM PulseGuiding and let ASCOM manage the guiding. The alternative is to select ST-4 and let your guide camera talk directly to your mount through what is called a ST-4 cable. That cable is usually supplied with your guide camera. You will benefit from letting ASCOM manage this for you, without me going into details about guiding in this post. In the general options section enter a friendly name for this mount, such as Skywatcher HEQ5 Pro.
Click ok at the bottom and then you are returned to the EQASCOM Toolbox and then you click on ASCOM connect.
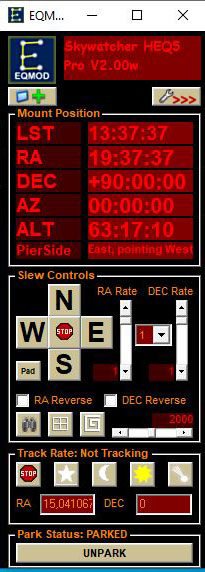
 If everything was configured correctly the EDMod mount control panel will open. It will most likley be parked and EQMod will also assume that you are in the home position. At this time, you can click on unpark and try slewing the mount to any position. Adjust the RA and DEC rate in order for the mount to move at speed you will actually notice. When you are statisfied that the mount is working click on ASCOM disconnect in the EQASCOM Toolbox.
Now that we have basic connectivity we want to add a planetarium software to make it easier to locate objects in the night sky.
Link to Cartes du ciel: https://www.ap-i.net/skychart/en/start
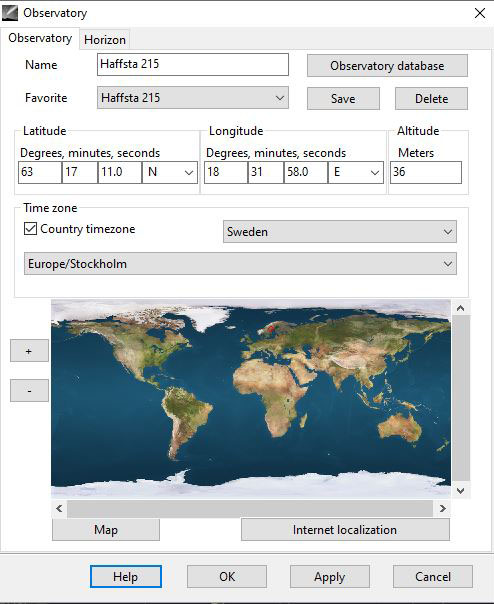
Cartes du ciel is one popular planetarium application that you can download using the link above. Install it and open the application, open setup menu and click on observatory. Enter a name for your location and then enter the latitude and longitude and altitude for your location, exactly as you entered them in EQMod. Click on apply and then ok.
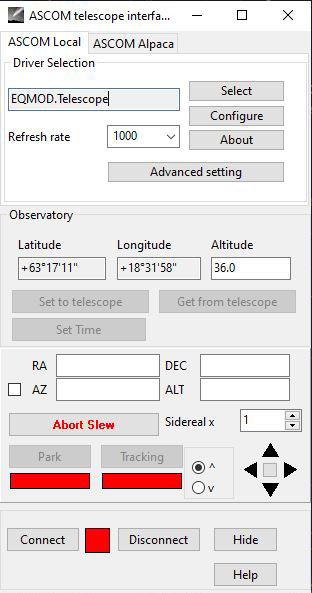
Open the telescope menu and click on setting. Make sure that ASCOM is selected. Open the telescope menu again and this time click on connect telescope. Click on select.
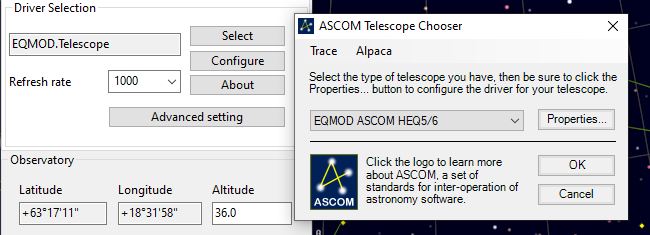
Choose your mount in the drop down list or make sure that your mount is already selected. You can click on properties if you need to make changes to the configuration (will open EQMod settings). Click on ok.
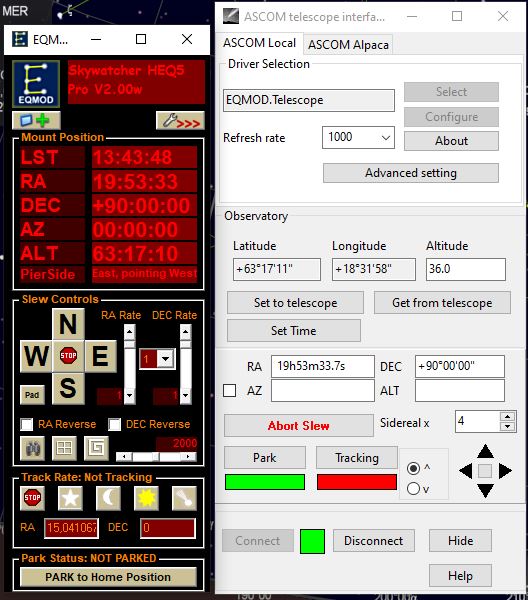
Click on connect and the application will connect to your mount and also start the EQMod control panel. Verify that you get a green color in the connection box. In my screenshot I haven’t balanced or polar aligned my mount and therefore tracking is not active.
Now you can use the application to search, select and slew to any target in the night sky. If you want to use another popular software you can try out Stellarium.
Link to Stellarium: https://stellarium.org/
Browse to the website, download the software and install. Start Stellarium and open the configuration menu to the left, scroll dock to telescope control and click on plugins. Check load at startup, close and open the application and go back into the same settings and click on configure.
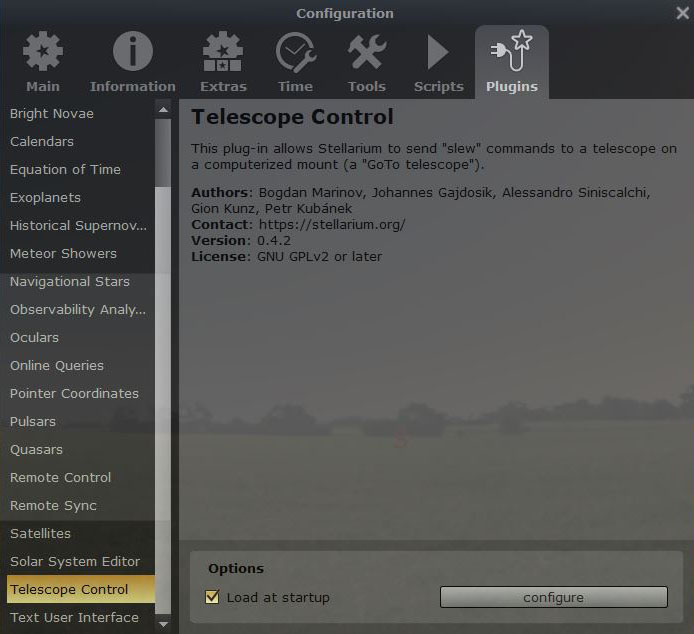
For some reason I was unable to get screenshots that was not semi transparent, but I hope you will see something anyway. If this is the first time you open this dialog window, click on new.
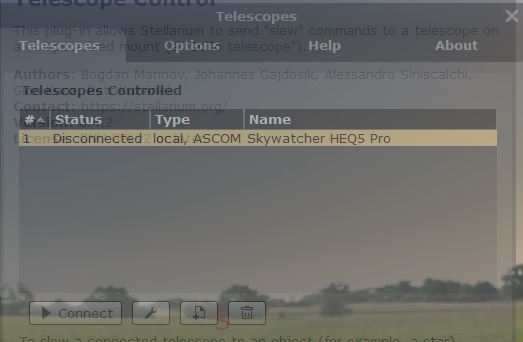
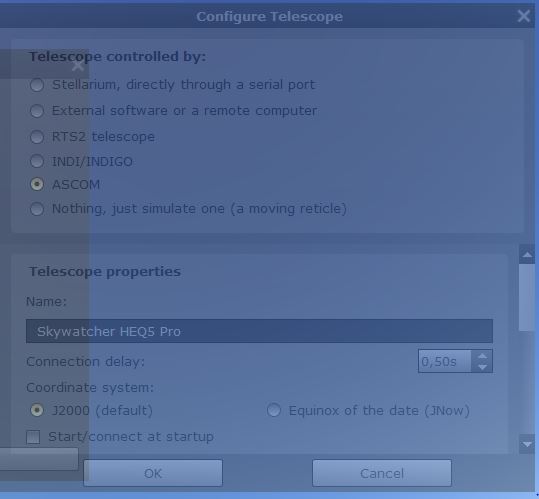
Select ASCOM, type in a name, for example Skywatcher HEQ5 Pro and then scroll down and select your device. Make sure that this is the same as in EQMod. Click on when finished.
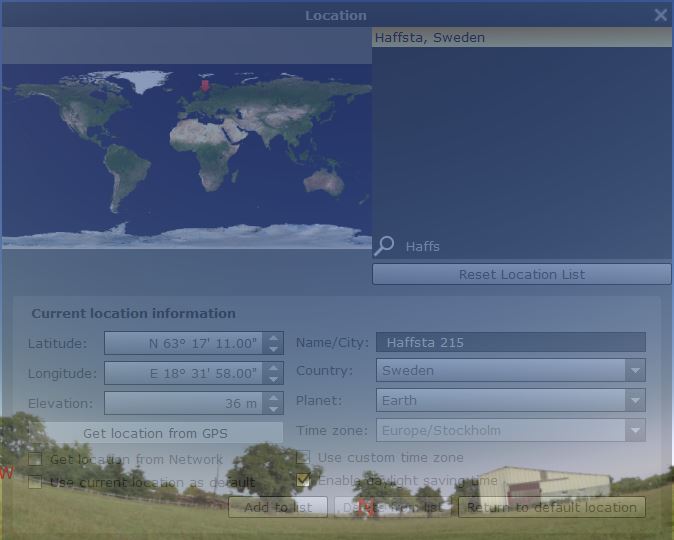
Last but not least, open the location menu to the left and create a new site for you. Enter latitude and longitude and elevation as entered in EQMod. Add your location to the list for future use by clicking on add to list.
Now you can search for objects and use the slew feature to point your telescope on the target.
Keep checking in for future content.
Clear skies!

